
*This post may contain affiliate links. As an Amazon Associate we earn from qualifying purchases.
If you own a Sega Mega Drive, you have probably had an issue with the sound. Maybe one of your friends is having an issue and you are looking up the answer. Well you will definitely want to keep reading this article!
So How do you fix a Sega Mega Drive that has no sound?
If your Sega Mega Drive doesnt have sound, you will want to check the cables running from the back of the system to the TV to make sure that they are working properly. If they are not, you will want to use the headphone jack on the front of the console as your primary audio source.
No matter if you prefer to call it the Sega Mega Drive or the Sega Genesis, you will want to keep reading this article to learn about the capabilities of the Mega drive and the sound chip used in this system. You can also watch this video which will tell you everything there is to know about the sound chip in the Sega Mega drive and Genesis.
Are you a huge Sega fan? Then you have to check out the amazing Sonic and Sega gear that you can get. Whether you want a Sonic wallet, a Sega sweatshirt, or a classic hat there are plenty of choices to choose from. You can find them all by clicking here.
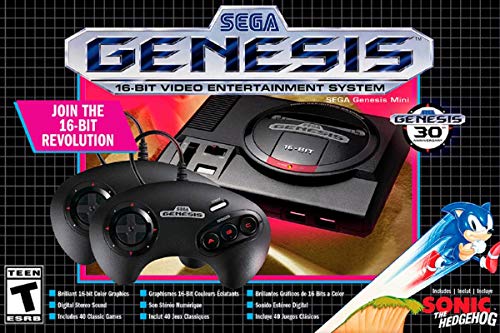
If you love Sega then you will want to check out this Sega Genesis Mini console. It comes with two controllers and even comes preloaded with 42 Games!
Enjoy these classic Sega Genesis games without having to purchase a single game cartridge!
Sound capabilities of the Sega Mega Drive
The Mega Drive is a 16-bit console manufactured by Sage developers. There are a number of Apple Macintosh computers or PC and arcade machines that use the same sound system. This sound system is called the Zilog z8o coprocessor which is an original processor of the master system. The Z8o has a capacity of controlling all the audio and sound system in Sega Mega Drive. The Motorola 68000 is also partly responsible for producing the sound that we enjoy in the Sega Saturn.
SOUND CHIPS
As for the sound chip the Sega utilizes the features of the Yamaha YM2612 and Texas Instruments SN76489. These are very simple sound chips, and after editing they are very easy to remove. There are three square waves in these chips and multiple noise channels. This sound system is home to the sound processing of the original NES chip. If you want to hear multiple FM channels on the Sega Mega Drive then you will need to use the Yamaha YM2612.
Yamaha has raised the synthesis of the FM channel to 6, so by utilizing these excellent working sound chips, you are able to play approximately six FM channels on the Sega Mega Drive. The developer designed two spaces in the device of Sega mega drive. The purpose of these spaces is for sound expansion modules. The six system channels in the Sega Genesis are giving the facility a number of FM channels and sounds.
How does creating sound for the Mega Drive work?
The first excellent working chip is the Yamaha YM2612. The Yamaha YM2612 is a well organized and multi-tasking chip that produces the sound like a real drum beat. So in the form of sound, you can get splash Sega sound. Another sound-producing chip is the SN76489. This chip is an older chip then the Yamaha YM2612.
They are responsible for producing the sounds of bleeps and bloops. So playing and producing the sound in the Sega is a very challenging task. First of all, you can make a file of any Sega Genesis game which is called the VMG music file.
The second step is uploading the file on to Adafruit ESP8266. Adafruit ESP8266 is a kind of chip in addition to the flash memory. The main roles of this sound chip are to create or generate the music in the drive. With the help of these two sound creating chips, you can even get the breezy melody of any sound you can think of.
Tips and trips for the sound and music
The following are advantageous tips of sound and music in Sega mega drive. The implementation of notes is very easy, and can be done by utilizing the MIDI keyboard. You must remember that making each file of VMG smaller is better. The perfect size though is the 30 to 60kb.
Also there are a number of channels available. These channels range from P01 to P10. The sequence of channels is from left to right. For spicing up the music you will want to use the volume and vibrate effects. If you do decide to use a few of the samples in the music file, you will need to remember that they will make the size of the file bigger. If you do not remember this, it will cause problems when people go to play the file.
In VGM file all the file formats are saved in FM, PCM, and PSG. So when these formats are converted into VGM the size of the file is increased. For examining the tunes you can use the sonic player. This player is doing excellent performance in VGM files. If you want to hear loud music then you will want to convert your PSG file into a VGM file. For the doubling and correct temperament, you can use 32 notes of music.
Sega Genesis or Sega Mega Drive?
The Sega Genesis has a huge collection of games like arcade games port and a number of distinctive sports games. When it was originally released, it was called the Sega Mega Drive, but was renamed for the North America release to be called the Sega Genesis. So while some people may call the system the Mega Drive, most people call it the Sega Genesis as that is the name it was known by in the United States.
The games for the Genesis or Mega Drive were quite popular, but with other more popular consoles releasing the same year, the Genesis did not end up having many sales in the United States. The Sega Genesis actually only sold 35 million consoles worldwide. Although this may seem like quite a few, the Original Nintendo sold almost double of this amount in the time it was released. Although it was not the top selling gaming system, the Sega Genesis did take the top spot for a while and actually even put Sega on the gaming radar of Nintendo.
Conclusion
Now that you know how to fix the Sega Mega Drive or Genesis sound, you can go and let your friends know you fixed your console, and can come fix theirs as well. If somehow you still do not own a Sega Mega Drive, you will want to order one here!
There are alot of people that love playing the iconic games of the Sega Genesis, and even though it was not the top seller, it still made Sega a decent amount of money in sales. Most gamers cannot argue with the iconic games of the Genesis, and even today still play the games, and love the console! Some gamers even love the console and games so much that they call the Sega Genesis the best console that was ever released.
The top 10 games for the Genesis are still played by millions of people today! If you are interested in the top 10 games for the Genesis and what they are, you should check out this video!